Friday, August 20, 2010

SolidWorks Rx

While it would be great if all of our favorite applications ran without issue, it simply isn’t the case. It is not uncommon for me to issue crash reports for applications on my phone. Most of these applications range from a few kilobytes up to about 25 MB. Yet, no developer can anticipate all the combinations of running applications and other aspects of the health of my smartphone. Now, let’s expand this concept to an application the likes of SolidWorks. Now we’re talking about a program that is several gigabytes and installed on computers that vary wildly in both hardware and software configurations. We have all pushed our computers to the limit with SolidWorks at some time. RAM usage ramps up when we load large assemblies. Our CPUs are constantly hitting 100% regardless of the number of processors or cores we have. Additionally, the beautiful graphics we enjoy including real-time reflections and self-shadowing are only possible by giving our workstation-grade video cards a full workout. If we drove our cars the way we operate our computers, we would expect things to constantly break and wear out. Of course, we have no patience for our workhorse applications to just take a break when we’re in the middle of drafting our latest designs. So, while SolidWorks is always working to address reported problems with the software, they have provided a tool for us to help identify aspects of our computers that might be less than ideal habitats for SolidWorks. Enter SolidWorks Rx.

As is obvious from its name, SolidWorks Rx is a tool to help you diagnose issues with your computer that might cause issues while running SolidWorks. Let’s take a glance at some of its features.


The Home tab briefly describes the tools included within the utility. There’s also a couple of links to help you launch SolidWorks in one of two “Safe Modes.” These are intended to help you bypass things that commonly cause problems. By launching SolidWorks in Software OpenGL mode, you’ll be bypassing your graphics card and using your CPU to process graphics. Expect SolidWorks to run slower when you’re interacting with your model. Rotating and zooming will likely be significantly slower than you’re used to. This will, however, help you determine if your graphics card is possibly the source of issues. The other Safe Mode will, as it states, bypass your Tools/Options settings which are stored in the registry which, if damaged, can cause all manner of odd behavior. Now, just because these two Safe Modes are listed on the first screen of Rx, it does not mean that you should start troubleshooting by launching SolidWorks from these links. Instead, I suggest you start with the Diagnostics tab.

On the Diagnostics tab, you will find lots of information about your computer, especially as it pertains to SolidWorks health. Ideally, you will find all green checks along the list. However, it is quite common to see red or yellow X marks or a bubble with an I in it. Generally, the red X marks deserve the most immediate attention. You’ll find all kinds of useful information on this page including your graphics card model and driver version, how much RAM you have free and even if you have SolidWorks Toolbox loaded locally (a subject for another entry).

The Troubleshoot tab is quite handy for running pre-defined searches in the SolidWorks online Knowledge Base. When you click on any of these links, you will be taken to the KB inside the Customer Portal. You will need to have or create a Customer Portal account to access this information.

One of my favorite tabs is the System Maintenance tab. From here, you can configure a handful of tasks for Rx to run. These tasks can clean up temporary files, run checkdisk and also defragment a couple of drives. While these may seem like minor items, gigantic piles of temporary files and heavily fragmented drives can actually cause “Not Responding” messages while using SolidWorks as Windows may be scanning through thousands of files or waiting on a bouncing hard drive head searching the world over for your desired file or while searching for a place to store temporary data. This message is often misinterpreted as a crash (although that may be the case) when, in reality, Windows has just waiting longer than expected to hear communication from SolidWorks when Windows itself may be the culprit. Keeping close tabs on your temporary data and disk fragmentation is a simple, crucial step to keeping your computer running as expected. Once you have setup your tasks as you want, you can run them all at one time immediately or on a schedule. I have mine run every single day at noon. This way, I don’t forget to grab lunch while I’m plugging away. Note that SolidWorks does not need to be running for these tasks to execute. Since I run these every day, it takes no more than 10 minutes for Rx to tidy up my 500 GB HDD.

For repeatable issues that you are encountering, nothing surpasses the Problem Capture tab for helping tech support delve into what might be causing your problems. If you find yourself saying anything like “every time I click on this button in SolidWorks…” then the Problem Capture tab should be something you try out. The point of this feature is that you can have Rx record a video of your SolidWorks session, then optionally attach the video, some system information and even your SolidWorks files along with your description of how to reproduce the problem all packaged into a ZIP file. When you send this ZIP file to TriMech technical support, we can use it to diagnose or attempt to reproduce the problem. It is also invaluable if we need to submit the problem to SolidWorks Corp. Believe it or not, if you have just encountered a problem with SolidWorks, but you weren’t recording the session with Rx, you can still use Problem Capture to record some information about your system. Once you have captured a problem, the Files and Logs tab will be available so that you can see what was recorded and even playback the video.

Lastly, on the Addins tab, you can find a link to the Administration Guides on the Customer Portal and can even tag on links to launch any executable that you might want to group here. For instance, you might want to create a link to the SolidWorks Copy Options Wizard so that you can quickly save and load your SolidWorks options settings. You can also add a link to launch other diagnostic tools such as Performance Monitor or your favorite Resource Monitor.

For further assistance diagnosing your system or interpreting the data collected by SolidWorks Rx, contact your friendly TriMech support technician and share your Rx results with them.
Monday, August 16, 2010

SolidWorks Sustainability

SolidWorks Sustainability – Really
When I first heard that SolidWorks was going to release a Sustainability product I can honestly say that I was less than thrilled. I think that it has been equally dismissed as heralded in the general press and the online world. I personally have seen some keen interest in the SustainabilityXpress version as well as the stand-alone product and so I thought that I would share my experiences with you.

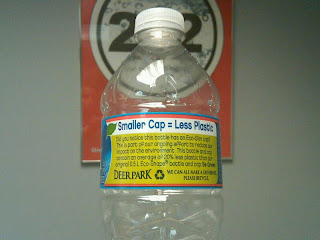
You may already know that the technology is pretty well known and regarded. The data used by SolidWorks Sustainability is provided by PE International of Stuttgart, Germany. They have provided software and consulting services in sustainable design and LCA for almost 20 years. As I write this I am drinking out of a Deer Park water bottle that on the label talks about using an Eco-Slim cap that uses less plastic. In fact, this press release earlier this year titled SolidWorks Sustainability wins Design News Golden Mousetrap Award 2010 for Innovation and Creativity, shows some good promise.


Life Cycle Assessment, LCA, is the analysis that looks at a product’s entire life, including ore extraction, material production, manufacturing, product use, end-of-life disposal, and all of the transportation that occurs between these stages. This is potentially a simple way to include some additional information into your design cycle to help you make better decisions. Information is power.

The information that you will be able to review is Air Acidification, Carbon Footprint, Total Energy Consumed, and Water Eutrophication. If you would like a more detailed description of these metrics, please review the Sustainability website. The important point to remember here is that these are concerns that help provide you insight into what impact that you have by choosing manufacturing aspects of your design and can give you a qualitative assessment of your choices.

So, give the SustainabilityXpress product a shot; you can find it under the Tools toolbar and see if this is another tool that you can use to provide you some insight into your overall design process.

Note: If you’re using SolidWorks 2009, you can download SolidWorks SustainabilityXpress at SolidWorks Labs.

Monday, August 9, 2010

Weldments...and more

Weldments have been around for quite a long time in SolidWorks; introduced in the release of SolidWorks 2004, Weldments make it much easier to create structural steel assemblies. In this posting, I’ve taken the opportunity to answer a few questions about the tool and to highlight some things that might help even the most experienced of users to get the full use of this extremely powerful tool.

Q: What is a “Weldment”?

A: That’s a great question. Every time I type “Weldment”, spellchecker goes crazy and says it doesn’t exist as a word. A “Weldment” is typically structural steel or aluminum members that form some kind of framework.


Q: Okay, great…I don’t do structural steel shapes, I’ll just deactivate “Weldments” from my Command Manager

A: Hold on just a second….the “Weldment functionality” in SolidWorks can be used to quickly create any model where a typical profile follows a path. Think of something like a deck. Decks are typically constructed using a few different size board profiles (2 x 4, 2 x 6,etc). We can use SolidWorks to sketch the path for all the boards and then lay in the profiles using the “Structural Member tool”. The great thing is that Weldments can be used to produce a cut list (similar to Bill of Materials for assemblies), and in this example you could take it down to your favorite hardware supply store to purchase your materials.


Q: When I activate the Structural Member command, there doesn’t appear to be a lot of options for profiles to follow my path.

A: That is correct. You may have to create profiles for “non-steel” shapes such as 2 x 4’s, etc., but if you do it once, that option will always be available for you down the road. It’s a pretty easy process to create those profiles. Typically, if you used the default install location, your weldment profiles will be located in some area such as C:\Program Files\SolidWorks Corp\SolidWorks\data\weldment profiles

You can always open up and modify an existing profile (saving it as a different name, etc.); you can see below that it’s a pretty basic sketch that you are working with. The subtle difference is that this is saved as a library part vs. a regular part file.


Q: All we do is structural steel shapes and we use a lot of them. Why can’t SolidWorks just include them in a library for us?

A: Actually…they did. SolidWorks included the profiles, but there is a little process to add them in. In fact, you must first download the profiles from the internet. My guess is that the reason they are not included on the default install is that the size of all those profiles eats up a good amount of disk space. If you download the “Ansi Inch” group alone, it’s over 30MB.

Go over to your design library area in the Task Pane, and browse the folder at the bottom “SolidWorks Content”. There, you will see a variety of profiles. If you hover above the icon, then instructions will pop up that tell you to hold “Control” and left click to download the zip file. Download the file to a location you like. After the download, you will need to unzip the files and locate them in the Weldment profile directory (described above). If you have done that correctly, you will get all the weldment profiles you could ever want or need when you go back into the Structural Member tool.


Wednesday, July 7, 2010

DraftSight


Dassault Systemes recently released a nifty tool called DraftSight to help manage your legacy 2D Data after converting to a 3D Tool. Here are some FAQs regarding the release.

Q: What is Draftsight?

A: Draftsight is an AutoCAD LT clone. It reads current versions of DWG and DXF including AutoCAD 2010. It is offered as a free application by Dassault and can be downloaded at the following link www.3ds.com/products/draftsight/#vid1


Q: How do I get support for Draftsight?

A: Draftsight Support is handled through a "Draftsight community". There is free documentation to get you started if you are unfamiliar with using the tool as well. There is an "Enterprise License Subscription" which can be purchased for $250.00 which entitles you to:


  1. Telephone and email support
  2. Network licensing
  3. API Support-LISP
  4. Remote Desktop Support
  5. All of the online training materials offered through online support

Q: What platforms will Draftsight run on?

A: Currently-Windows 7, XP, and Vista. Mac availability should be available later this year.

Q: Who can download this application?

A: Anybody! No need to own SolidWorks or any other CAD at all. Download and enjoy.

In summary, this tool is meant to ease the burden of maintaining a 2D tool when you convert to 3D Design just so you can modify legacy files in their native format (e.g. change a note, stretch a quick dimension, etc.) It is also handy for knocking out a quick drawing that is more suited to 2D such as a P&ID or Electrical Schematic when you are more comfortable in an AutoCAD-like interface.

Thursday, June 17, 2010

First TriMech Solutions Blog

Welcome to the first blog from TriMech Solutions.

The first question is why should I read this blog? That's a great question. I'm not sure I have the answers, but I'll do my best to keep the information flowing, but also to keep this a light and entertaining read.

Okay, so I avoided the question somewhat. Let's just say the topics will range from "goings on" at TriMech to maybe some little technical nuggets on SolidWorks, otherwise known as Tips and Tricks.

So let's kick off this blog with a brief introduction to TriMech Solutions. TriMech has been a SolidWorks Partner for over 10 years providing SolidWorks Software, Training, and Support for over 2500 Clients during that time. The TriMech Corporate Headquarters is located in Richmond, Virginia, but there are Satellite offices complete with local technical resources and training facilities in:

Pittsburgh, PA
Columbia, MD
Waynesboro, VA (CAM)
Durham, NC
Charlotte, NC
Atlanta, GA

Complimenting the SolidWorks Solution, TriMech also has a team of recruiters that can help you find talented individuals on a contract, temporary, or permanent basis. Over the last 8 years, the requirements they have filled range from the obvious "SolidWorks Designer" to positions focused in the Electrical, Software, and Manufacturing fields.

In addition to providing assistance to locate resources, TriMech Services offers the ability to do small project based engineering work. Typical examples include light design work, reverse engineering services, and FEA analysis.

Our Waynesboro office offers expertise in CAM solutions and year after year continues to be the number one reseller nationwide of FeatureCAM.

So that's a little about TriMech. 50+ dedicated individuals spanned across the mid-Atlantic providing assistance to companies who need engineering help. We have some exciting events coming up at TriMech. Click here for more details http://www.trimechsolutions.com/events

Friday, June 4, 2010

Choosing an ERP system when you have EPDM

At some point in time many companies find themselves in need of an Enterprise resource planning (ERP) system and are then faced with the daunting task of trying to select the right package. By breaking the process into steps and following some simple pointers the selection can be made a little easier.

The first step is to layout your functional specifications and business needs and then select an ERP system that best deals with all of the requirements,whether it be accounting, freight tracking, inventory management or all the above.

If you already have EPDM in place in your organization then the question of exchanging date or integrating the two systems usually comes to light so the next step is to develop a plan for data flow and usage. Some things to consider when developing the plan; where will the master records be stored (ERP or EPDM)? What data needs to be exchanged? What will trigger the exchange? Who will have access to the systems? Will EPDM users have access to both systems?

Once you have a plan in place information can be easily exchanged between the two systems in most applications using the EPDM XML (extended markup language) import/export functionality. If your requirements go beyond the mainstream needs then using the included API (application programming interface) you can develop an add-in or stand alone application to integrate the two systems together.

Choosing the right ERP software and integrating it with EPDM does require a lot of groundwork but with a carefully laid out plan members of your organization will be able to work together exchanging data efficiently and accurately.

Common ERP Vendors:
http://en.wikipedia.org/wiki/List_of_ERP_vendors

Open Source and Proprietary ERP Applications:
http://en.wikipedia.org/wiki/List_of_ERP_software_packages

** inclusion in the above list does not indicate preference from TriMech Solutions

Thursday, April 1, 2010

How Long Has That File Been Waiting For Approval?


Enterprise PDM workflows represent internal approval or release processes practiced within your company. You can use the workflow capabilities to automate a manual or papers based process, notify users of the document status and also control user or group access to files. But what happens after you submit that document for approval? It seems the question "Can I set an automatic reminder to alert someone if a file has been in a state beyond a certain amount of days?" comes up frequently when talking about workflows.


With the new task functionality available in EPDM 2010 you can write a task add-in to schedule a task that checks the number of days files have been in a selected workflow state and send a message to a selected individuals or groups for any files that have been in that state beyond a set number of days.


But what about those not familiar with API and are not comfortable with writing an add-in? Using the EPDM report generator you can create a report that will query the database and return a list of files that have been in a workflow state longer then the specified amount of time. The downside to this - no notification is sent out. Now you have this nice report to retrieve the information but someone has to log into the vault to run this report. So now the question is can I automate this report?

Using the SQL Server Reporting Services you can create a report using the same query mentioned above. Once this report has been configured a user can subscribe to this report and have it e-mailed to them on a scheduled basis; for example, every morning. Now each morning the users will get an e-mail containing a list of files that have been in a workflow state longer than the set amount of days.

Pretty simple right? Wait a minute, there is a lot going on behind the scenes in that EPDM database so how do you know what tables to query and how to get all this info put together? Of course you do need to have a basic understanding of T-SQL to create the reports. If you are comfortable with T-SQL listed below is the SQL query needed to get the info:

-- Query to return files in specified workflow state over set amount of days

SELECT Distinct D.Filename As [File Name],

CONVERT(VarChar, TH.Date, 101) AS [Entered State],

DATEDIFF (dd, TH.Date, GETUTCDATE()) as [Days In State]

FROM Status AS S

INNER JOIN Documents AS D ON S.StatusID = D.CurrentStatusID

Join TransitionHistory AS TH ON D.DocumentID = TH.DocumentID

Where S.Name = 'Work in Progress' --<<>

and DATEDIFF (dd, TH.Date, GETUTCDATE()) > '5' --<<>

Order By DATEDIFF (dd, TH.Date, GETUTCDATE()) DESC

So now you have all the tools you need to answer the age old question “How long has that document been waiting for approval?”.